Friday, February 27, 2026

River Island Park - February 27, 2026

Through the snow drifts
It has been a tough couple of months for paddling. I've had a bad case of bursitis in my knee since December, and haven’t been able to kneel in my canoe. Add to that the brutal cold in January that iced up the rivers and cancelled our winter camping trip, and the 5' of snow in February that buried all the access points, and there hasn’t been much opportunity to paddle. Last month I got out on the Providence River in my sea kayak. Today, I ventured down to River Island Park with my canoe.

The river was at a low but fluid level – around 2’, which is probably around 500 cfs, but the gage was iced up. I dragged my boat through the snow drifts down to the boat ramp near the parking lot. I paddled upstream and played around in the current behind the bandstand. I could kneel for a while, but then my knee got too sore and I had to sit. I have an appointment for a cortisone shot - hopefully that will take care of my knee before the whitewater season starts. It was still nice to get out.

Finally back on the water

Saturday, February 14, 2026

Eureka Expedition Sentinel

Eureka Expedition Sentinel
on the Connecticut River
I finally found some information on my father’s old tent. It’s a Eureka Expedition Sentinel 2-person, four-season mountaineering tent. Spec’s are:

Size – 6’ x 8’ (but tapers down to 4’ at the ends)
Height – 3’ 10” in middle
Weight – 7 lbs. 6 oz.
Fold Size – 6’ x 20”

Inside view
It is a symmetrical tent with screened doors at both ends for easy entry/exit and good ventilation. The middle of the tent has a hoop allowing for more head and shoulder room. From this center hoop the body of the tent tapers down to Timberline style A-frames. The aluminum poles are shock-corded and break down to 20”.

The full fly is slightly hooded at both ends. It creates the second layer of the tent’s double wall construction. Air circulates freely in the space between the tent and the fly minimizing condensation and increasing insulation. There are 2 hooks on each side connecting the fly to the tent that pull out the side walls creating additional room inside. 

Under a tarp on the Moose River Bow
The tent is held down with 6 stakes, and the fly is held down with 4 S-hooks at the corners and 6 stakes along the sides. There are also 10 D-rings on the fly to attach guy lines. The tent is pretty bomb-proof in the wind without guy lines, so I've never used them.

With its hybrid hoop/A-frame design, the Sentinel was similar to the three-season Alpine Meadows, but with lower ends and heavier materials. The Alpenlite might be seen as its successor.

Eureka advertisement from the 1980's featuring a Sentinel like mine

Saturday, February 7, 2026

Classic Canoe Routes In Northern Ontario

I don't know if I will ever make it up there, but I saw this article on P-com, and decided to save it.  

French River — Pine Cove to HWY 69

The French is a Canadian classic for good reason: pink rock, wind-twisted pines and an exciting introduction to white water (or portaging). It’s also friendly to a wide range of paddlers.

Put-in / Take-out: Commonly put in at the Lodge at Pine Cove and take out at the French River Supply Post and Marina. Ideally leave a vehicle at the French River Supply post to get back to your other vehicles at Pine Cove.

Trip Length: 3-to-5 days.

Portages: Short carries around ledges and falls depending on water; expect well-used trails at and portages around all major rapids.

Camping Permits: French River Provincial Park backcountry permits are required; reserve or self-issue as directed at access points.

Difficulty: Easy to intermediate. Most rapids are runnable swifts at summer levels, but others require a quick portage if you don’t have whitewater experience.

Why Go: Classic shield scenery, easy logistics, plenty of campsites and route options. If you only have a long weekend, this is your Northern Ontario sampler.

Outfitters: Black Feather Wilderness Adventures have been running French River trips for decades. 

Spanish River — Sinker Creek to Agnew Lake

The Spanish strings together lakes, swifts and honest rapids through deep, empty country. It’s a favorite for first “real” river trips and never feels overbuilt. Plus, you get to use a train as your shuttle vehicle. If you’re doing the West Branch, Sinker Creek is a great place to put in for a week-long adventure.

Put-in / Take-out: Sinker Creek to Agnew Lake. The best way to do this is to leave vehicles at the Agnew Lake Lodge then catch the train in Sudbury.

Trip Length: 4–7 days.

Portages: Frequent but reasonable carries around named drops; expect trails at key sets such as Cliff Rapids, Agnes Rapids and others depending on branch.

Camping Permits: Spanish River Provincial Park backcountry permits are required.

Difficulty: Intermediate. Continuous current, cold water and a handful of rapids that demand proper scouting. Levels rise quickly after rain and drop a lot in mid-summer. Best to check with local outfitters like Spanish River Outfitters.

Why Go: Although the train ride isn’t long, there’s something about being left in the wilderness alongside a train track that is quintessentially Canadian. Plus, the campsites are incredible and the river itself is “just spicy enough” without being a sufferfest.

Outfitters: Spanish River Outfitters.

Moose River — Moose River Crossing to Moosonee

Big skies, big water and a surprisingly approachable northern journey if you’re prepared for weather. This is a current-assisted glide to the edge of the salt.

Put-in / Take-out: Moose River Crossing (rail flag stop) to Moosonee/Moose Factory. Many paddlers use the train to reach the put-in and to return from Moosonee to Cochrane.

Trip Length: 2–4 days, ~95–120 km depending on start and meanders.

Portages: Generally none on this reach. The hazards are water level, wind, tide and sheer volume, not ledge drops.

Camping Permits: Predominantly Crown land. Check current requirements before departure.

Difficulty: Intermediate with caveats. Navigation, tides and weather matter more than technical whitewater. Strong wind can pin you onshore; a rising tide can reverse flow near the end. Plan camps with changing water levels in mind.

Why Go: Experience the feel of the true North without weeks away. It’s a different kind of challenge; this is true wilderness which makes it truly rewarding.

Outfitters: MHO Adventures run regular trips on the Moose. 

Algonquin Park — Canoe Lake to Burnt Island Lake loop

Algonquin is one of the most historic, accessible and time-tested canoe regions in the country. For many paddlers, it’s the gateway to everything that comes after. The classic 3-to-4-day loop from Canoe Lake touches Tom Thomson country and gives a perfect mix of open water, sheltered creeks and short portages.

Put-in / Take-out: Put in and take out at the Canoe Lake access point (Hwy 60 corridor). There’s easy parking, permits and rentals available on-site through Algonquin Outfitters.

Trip length: 3–4 days.

Portages: Several carries under one km. Short, well-travelled and well-signed. Portages into Joe, Littledoe, Baby Joe and Burnt Island are maintained and wide.

Camping Permits: Algonquin requires advance reservations with specific lake-by-lake bookings. Provincial park interior camping fees apply. In some ways booking is the most difficult part of this trip; you’ll need to plan your entire trip from campsite to campsite. If you want to be there on summer weekends, you’ll need to book months ahead.

Difficulty: Novice to intermediate. Watch for big winds on Canoe, Joe and Burnt Island Lakes. They can be serious, but all routes are straightforward. Great for families, first-timers or shoulder-season trips.

Why Go: Algonquin delivers that Canadian Shield immersion with none of the logistical headaches. There are excellent portages, marked campsites and great outfitters in the area. It’s busy in summer, but still magic at dawn when the mist sits low and you realize why people have been paddling this exact route for more than a century.

Outfitters: Algonquin Outfitters, Algonquin Basecamp, Opeongo Outfitters, Algonquin Bound Outfitters.

Wabakimi Wilderness — Canada’s Quietest Canoe Kingdom

If you’re looking for true northern solitude, Wabakimi Provincial Park is the definition of it. Located northwest of Thunder Bay and accessible primarily by floatplane or train, Wabakimi is 13,000 square kilometers of pure, roadless boreal wilderness. It’s larger than Algonquin but with only a fraction of the visitors.

Classic route: Allanwater Bridge to Little Caribou Lake

This is the most iconic Wabakimi route. A remote, rail-to-rail journey through lakes, swifts and winding river systems. You start by boarding VIA Rail and getting dropped off at Allanwater Bridge, then paddle south through the Allanwater River chain and exit at Little Caribou Lake near Armstrong Station.

Put-in / Take-out: Allanwater Bridge (via VIA Rail flag stop), Armstrong Station

Trip Length: 7–10 days

Portages: Regular but short. Classic Canadian Shield terrain

Camping Permits: Ontario Parks interior permit required

Difficulty: Intermediate to advanced. Remote, whitewater experience strongly recommended.

Why Go: Wildlife sightings are common: moose, bald eagles, woodland caribou. And you can realistically be here for a full week without seeing another paddler. This is true solitude, where self-sufficiency matters. Satellite communications, solid weather planning and whitewater judgment are essential.

Outfitters: Wabakimi Canoe Outfitters can provide everything you’ll need for a trip in this massive wilderness. They’ve mapped out tons of routes and between Bruce Hyer and his son Micheal, they’ll be able to get you all set up with shuttles, routes and everything in between.

Trip Logistics and Planning Tips

Maps & Navigation: Carry large-scale topo or adventure-series maps for all routes.

Water & Levels: Snowmelt and rain change everything. Spring brings pushy water and colder swims; late summer can mean exposed ledges and more lining. Check gauges if available and talk to local outfitters.

Bugs & Bears: Expect both. Pack head nets in June/July and follow standard food-storage practices everywhere.

Permits & Rules: Provincial park interior permits and Crown land regulations can change. Confirm current requirements, especially if any party members are non-residents.

Shuttles: The French and Algonquin are straightforward by road. The Moose involves the Polar Bear Express, the Spanish and Wabakimi require Via Rail journeys. It’s good practice to book trains and coordinate pickup windows well in advance.

Experience Level: Be candid about skills. It’s easier to portage a rough section than go for a swim and lose your gear.

Outfitters Are Your Friends: If you don’t know, call the local outfitters. Not only do they know the area, the water levels and the current condition of rivers and lakes, they’re also open to creating custom trips for paying customers. Or join one of their regular trips. There’s no better way to get to know a bunch of people than spending a few days on the river with them.

Links:

Saturday, January 31, 2026

Snowshoeing at F. Gilbert Hills State Forest - January 31, 2026

Warner Trail
I’ve been nursing a sore knee for a couple of months, so I probably should have skipped this trip. Then again, conditions were just about perfect, and it was only a half-hour from my house, so I made a last-minute decision to join Papa Joe and the crew for a snowshoe hike at the F. Gilbert Hills State Forest.

The F. Gilbert Hills State Forest (previously known as Foxboro State Forest) is a 1,000-acre site with 23-miles of trails in the towns of Foxborough and Wrentham. It is adjacent to the Harold B. Clark Town Forest to the north, and connects to Wrentham State Forest to the west. The park is also part of the 30-mile Warner Trail that stretches from Sharon to Diamond Hill.

Queued up to break the trail
We met near the Southeastern Massachusetts Emergency Communications Center (SEMRECC) at 100 High Rock Rd, Wrentham, MA 02093. The temperature was around 3-degrees when we headed out, but it got up to around 19-degrees by the time we finished. No one was cold – snowshoeing is a good workout.

We we did a 2.3-mile loop down a section of the Warner Trail that includes the Stone Staircase (one of many structures built by the Civil Conservation Corps in the 1930’s), then over to Sunset Ledge, and finally over to the shelter near High Rock before returning to the cars. Conditions were perfect - nice light powdery snow. It was a great trip, even if my knee was a little sore at the end.


The crew near High Rock

Monday, January 19, 2026

Introduction to Canoe Camping - January 18, 2026

I was glad to be one of the presenters at the NH/AMC’s Introduction to Canoe Camping. The session was focused on paddlers interested in moving into wilderness tripping. Presentations included Trip Planning and Organization (Jonathan), Necessary Skills (Bob), Boats and Paddling Gear (me), Camping Gear (Deb), and Food and Cooking (Cathy). In addition, several presenters did presentations on their favorite trips (I did the Connecticut River), and there was a Show and Tell table where folks could see and ask questions about gear. It was a great session, and very well received.

Saturday, January 10, 2026

Providence - January 10, 2026

After a long cold spell, the forecast was for warming temperatures this weekend. I decided to take my kayak to the Providence River and paddle from Bold Point up to the Cove at the Providence Place Mall. I was in the boat on the water when I realized that I forgot my camera in the car, so this is the only picture that I got. You'l have to trust me - I really did paddle.

Monday, January 5, 2026

Reflector Oven

Get the flames going
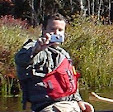
I love bringing my Dutch Oven along when camping. It is great for baking just about anything, but it is a pain to lug around. I've always thought that a reflector oven would be lot easier on trips where weight is an issue.

When we went to the Allagash in the Fall, a friend brought his reflector oven, so I got to practice with him. We made baked peaches with cinnamon and sugar (worked great), pork lion (baked while the rest of dinner was cooking, but did need to be finished in the frying pan), and cinnamon rolls (let them go just a little too long, but they came out OK).

Cinnamon rolls 
A reflector oven is basically an aluminum box with one side open to capture radiant heat provided by an open fire. Mine is the Svante Freden from Sweden. The oven folds flat for easy storage. The food to be baked is placed on the shelf in the oven. The amount of energy captured by the oven depends on the temperature of the fire and the oven’s distance from the fire.

The real trick of cooking in a reflector oven is controlling the fire. You need a good, hot fire with lots of flames. The best fire for the reflector is a log-cabin or teepee built to the height of the oven’s cooking shelf so that the flames are above the food. Be sure to have lots of dry wood on hand, as you will need to keep those steady flames going for the entire time you are baking. You can also take well-burning logs and stand them on end.

Letting the flames do the work
You can estimate the temperature by holding your hand just in front of the oven. If you can hold it there for around 5 seconds, the oven temperature is around 350 degrees. If the cooking temperature seems too hot or too cold, you can move the oven backward or forward to adjust it. Start with the oven about 8" from the fire.

The slanting top and bottom of the reflector direct the heat from the fire toward the food being cooked. The temperature is hotter at the back and at the front, so you need to rotate the pan frequently to prevent hot spots and allow for even baking.

The whole meal is cooking -
reflector oven, Big Daddy
skillet and Dutch oven
You need to be very careful working around an open fire, and because you are cooking with radiant heat, the oven and pan will get ripping hot. It’s a good idea to bring oven mitts for protection.

What can you bake in a reflector oven? The short answer is just about anything - breads, biscuits, cookies, brownies all work fine. With time and patience, you can even do casseroles and roasted meats.

Bannock (Gil Gilpatrick's "Canoe Country Bread" recipe)

4 cups flour
1/2 cup sugar
4 tsps baking powder
3 tsps salt
Few table spoons of water

Mix ingredients with a few tablespoons water. Bake until bread rises, is browned, crust is stiff when tapped, and knife blade inserted into bread comes out clean. It can be baked in a fry pan with a little oil, on a stick, or in a reflector oven. 

Biscuits

3 cups flour
6 tablespoons baking powder
½ teaspoon salt
6 tablespoons oil
1 cup milk

Mix ingredients. Roll on a flat, flour-covered surface. Cut out biscuits and place in baking pan. Bake until browned and stiff, and knife blade inserted into biscuits comes out clean.

Chocolate Chip Cookies

2½ cups flour
½ teaspoon baking soda
¼ teaspoon salt
½ cup unsweetened cocoa powder
1 cup dark brown sugar, packed
¾ cup white sugar
1 cup butter, softened
3 eggs
2 teaspoons vanilla
2 cups (12 ounces) semisweet chocolate chips

In a bowl, combine flour, baking soda, salt, cocoa powder. Mix well, set aside. In separate bowl, blend sugars well. Add butter, beat to form grainy paste. Add eggs, vanilla. Beat until light and fluffy. Add flour mixture, chocolate chips. Blend until just combined. Drop by spoonfuls onto pan. Bake until edges just start to brown. You can also use prepared cookie dough.

Brownies

1 cup sugar
½ cup shortening
2 eggs
½ cup flour
2 squares melted baking chocolate
½ teaspoon vanilla
pinch salt

Mix ingredients well. Pour into greased 8-inch square pan. Bake until knife inserted into brownies comes out clean. You can also use a store bought brownie mix.

Muffins/Quick Breads

Store-bought muffins or quick breads bake fine in a reflector oven.