Monday, December 18, 2023

Winter Camping

We are planning to do an overnight camping trip on New Year’s weekend, so it’s time to think about cold weather camping. At this point, we are not expecting snow, possibly rain and relatively warm temperatures (days in the 40’s, and night in the 30’s), but there are still some things to consider when camping in cold weather.

Tent - a three-season tent will probably work fine for this trip, but a four-season tent is even better. A four-season tent is designed to withstand heavy snow and wind. The tent fabric is heavier and the double wall construction allows it to retain heat better. I'll be using my father's Eureka Expedition Sentinel. You can't find this tent today, but it was originally designed as a mountaineering tent. Here are a couple of advertisements from the late 1980's. 


When pitching a tent in snow, pack down the snow since loose snow is more likely to melt with body heat. Snowshoes work great, or just stamp it down with your boots. I put plastic ground cloths under the tent, and inside for extra protection. When staking a tent in frozen ground, use heavy-duty stakes or nails. In the snow, use snow stakes or a deadman stick. 

Sleeping Bag – to ensure comfort on cold nights, it’s a good idea to use a bag that's rated at least 10° colder than the temperature you will be out in. I have my father's Sumberjack Quallofil winter bag with draft tubes at the zippers, and drawstrings at the shoulders and on the hood to help keep the heat in the bag. I can't tell from the bag itself, but it looks like what they used to sell as the Boundry 0.

Sleeping Pads - in cold weather its best to use two sleeping pads to keep from losing heat to the cold ground - a closed-cell foam pad on the tent floor, and an inflatable pad on top of that. Pads designed for winter use usually have an R-value of about 4.0 or higher. I'll use my father's ¼” closed-cell foam pad and a Klymit Static V insulated pad with an R-value of 4.4. I also have my father's original Therm-a-Rest - they don't make them like that anymore.

Clothes – as always, dress in layers to match the conditions – a base layer next to the skin, then insulating layers to provide warmth, and finally outer layers to protect against rain and wind. Look for synthetic fabrics or wool that dry quickly and wick perspiration away from your body. Don’t forget a hat, gloves and appropriate footwear for the conditions. Be sure to adjust your layering before you over-heat or get cold, and bring warm, dry cloths to sleep in.

Stoves - liquid-fuel stoves like the Whisperlite work fine in below-freezing temperatures. Canister stoves like my Jetboil need to be kept above freezing to produce vapors and work properly. When in doubt, cook on the fire.

Food – your body generates heat as it digests food, so if you’re feeling cold try eating some food. (Moving around will also help.) Before you go to bed, have a snack to keep your metabolism going and keep a candy bar nearby if you get cold in the middle of the night. I don't think we will need to worry about having enough food with this group.

Water - don't forget to stay hydrated. I usually bring jugged water, but in the winter you may need to pump or melt water. 

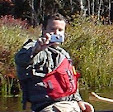
I'm lucky that my father was a winter hiker, so I have a lot of his old gear. For real winter camping you need to get out in the snow, but we'll try that another time.

Sunday, December 17, 2023

The Christmas Canoe

Another one to save for the future...

Not sure it beats my big red canoe Christmas Story, but it is good. Ray saw this on Facebook and posted about a Quebec beer - La Maudite - that uses the flying canoe as its logo. It evokes the legend of La Chasse-galerie - the flying canoe - that tells the story of men who would made a deal with the devil to fly home in a canoe to spend a night with their loved ones. This also earned another poem from Tom.

a Chasse-galerie,
the Devil put in play.
Feather paddle through sky. Curse words won't fly.
Avec mon cher dans Christmas Day.
TW

Links:

Thursday, December 14, 2023

How to Trim a Canoe

Stern trim in my Wildfire
How your canoe 
is trimmed can have a great impact on the way it paddles. I have dedicated solo boats for flatwater and whitewater, and both are trimmed slightly stern heavy. It wasn’t a conscious decision on my part, that’s the way they were set up when I got the boats. Moving around to change the trim really isn’t an option without moving the seat or the pedestal, and I’m fine with the trim as it is. I’m also a little heavy for these boats so they sit a little lower in the water.

For normal paddling, having the boat slightly stern heavy frees the bow and weights the stern so it is easier to go straight. You can lean forward to engage the bow and release the stern for turns. Healing (edging, leaning, whatever term you use) will also release the stems when you turn. Some asymmetrical canoe designs build this feature into the boat (more bow rocker like my Yellowstone Solo or Outrage) so you can have a more neutral trim.

Stern trim in my Outrage
For river paddling, a slightly stern heavy trim makes it easier to paddle upstream, to surf or to do upstream ferries. I do mostly river paddling. In wind, stern heavy is OK when paddling in a tailwind, but problematic in a headwind or even a beam (side) wind. The bow is going to tend to get blown downwind requiring lots of corrections. If you have gear in the boat that you can use to adjust the trim, that helps. Otherwise you just have to deal with it.

In waves you want the stems as light as possible to allow them to ride up and down the waves, so neutral trim is best. In my case I paddle mostly rivers, and I can usually manage by leaning back to lighten the bow when going through wave trains. Once again, some asymmetrical canoe designs build this feature into the boat with a fish-form design (widest section forward of the centerline like my Outrage) to increase buoyancy of the bow for rising over waves, so you can have a more neutral trim. It is all theoretical until you get out and paddle to figure out what works for you with your boat.

River Knives

There was a post on P.com on attaching a river knife to your PFD. I’ve had an NRS Pilot knife on my PFD for years – once you attach the clip the lash tab it is never coming off. To be honest, I’ve never been in a situation where I needed to use it for anything other than spreading peanut butter. The blade definitely rusts over time. When it gets too rusty I buy a new knife (cheap, so maybe you get what you pay for). They hadn’t changed the design in years, so the new knife still fit in the old clip. I knife I have is now in close-out, so I just bought one last knife

NRS Pilot River Knife
I never thought to actually try to cut rope with this knife until I saw this video. Just like in the video, it took 5-6 swipes to get through an old safety rope. I think the little cutting hook at the base of the blade made it harder to get through the rope. I had better luck with just the serrated section of the blade. On the newer version that hook is a lot smaller.

Just for kicks, I dug out my father’s old river knife – turns out it’s a Gerber Blackie Collins River Master. There are different versions of this knife, and all are rare and collectible. This is the version that I have. 

Gerber Blackie Collins
River Master Knife
With a longer blade and better serrations it usually cut through the rope on the first or second swipe. Leave it to my father – he always bought the good stuff. I’ve never used it as a river knife. It’s been in my kitchen kit for years. It still has a sharp factory edge, so I guess I’ll keep it there.

Saturday, December 9, 2023

Noanet Woods - December 9, 2023

Noanet Peak
It has been a while since I have been out on a hike, and I didn’t see any paddling trips today, so I decided to join Papa Joe and the crew at Noanet Woods in Dover, MA.

Noanet Woods has 17 miles of trails adjacent to the Hale Reserve. We started our hike at the Powissett Street entrance and hiked into the Hale Reserve. From there, we hiked over to the Mill Ponds to check out the old mill site and dam. Then, we hiked up to the Noanet Peak to check out the view of Boston before heading back to the cars.

Wednesday, December 6, 2023

Baking with Steam

What you need
I’m always looking for different ways to cook in camp. I love to make baked goods, but lugging the Dutch oven along can be a pain. I saw an ad on Facebook for the Can Cooker, and it intrigued me, so I thought I would give it a try. This method can be used to bake on the stove (or fire) using moist heat/steam.

When you bake a cake in the oven (or Dutch oven), dry heat surrounds the cake. The water contained in the batter evaporates, creating steam that helps the cake rise before it sets and gets firmer. While steam does play a role in baking in dry heat, the results are much different when it acts as the main cooking method.

Covered cake pan on the rack
Steaming a cake on the stove relies on moist heat. Using a double boiler of sorts, you elevate the pan on a rack above steaming water inside large, lidded pot. Steam creates the heat that gently cooks the cake. Because the moist environment prevents the water in the batter from quickly evaporating, less water is lost in the cooking process, resulting in a moister cake. Since baking with steam is done at a lower temperature (212 degrees for steam vs. 350 degrees in a dry oven), the cake will not brown.

Even at a lower temperature, though, steam will cook the cake faster than dry heat since it transfers heat more efficiently than air. Steaming a cake will take between 20 and 25 minutes, while dry baking it at 350 degrees will take 30 to 40 minutes.

Closed up for baking -
the frying pan on the top is just
there for weight
This method works for cakes, quick breads and brownies. You could also use it for a main dish like meatloaf or steamed fish and vegetables - just increase the cooking time. What will you need:
  • Stove with the ability to hold a pan of water at a low boil. If you are careful, you could do it on the fire, but maintaining the proper temperature might be tough.
  • Set of nesting pans - the larger must have a tight fitting cover.
  • A rack to raise the inner pan out of the water like a double boiler. In camp you could improvise - couple of small rocks would work fine.
  • Cooking spray.
  • Wax paper to line the bottom of the cake pan
  • Aluminum foil to cover the inner pan
The finished corn bread in the pan
Here's how you do it:

  1. Fire up your stove
  2. Place the rack in the large pan and add enough water so that it is just below the rack. Cover, put the pan on the stove, and bring the water to a boil.
  3. While waiting for the water to boil, mix up the batter for whatever it is that you want to bake. Spray the inside of the smaller pan with cooking spray and add the batter. (Lining the bottom with wax paper will help the cake release easier from the pan when cooked.) Cover the top tightly with aluminum foil to prevent water from condensing onto the food and making it soggy.
  4. Once the water boils, reduce to a low boil and put the smaller pan on the rack inside the larger pan. Replace the cover and don’t remove for 20 to 25 minutes. You want just enough steam in the pan to cook the cake. 
The finished corn bread removed 
The cake is done when a toothpick inserted in the center comes out clean. Let it rest a few minutes before releasing the sides and removing from the pan. 

I'd definitely call this experiment a success. The key is to cover the inner pan with foil to prevent condensed water from dripping on to the cake and making it rubbery. These pictures are Jiffy Mix cornbread, which came out perfect - just add chili for a great dinner.

Sunday, December 3, 2023

Santa Paddle at Wickford Harbor - December 2, 2023

Santa's elves are ready to launch
Its that time of the year when Santa visits cities and towns around the country to get kids excited for Christmas. Usually he arrives by fire truck, but in the coastal village of Wickford he arrives by fire boat, and RICKA members dress-up like elves to escort him down the harbor into town. This year, Michelle decided to come along as well to watch and take some pictures 
from shore.

Wickford is located on the West Passage of Narragansett Bay, and is built around a large, well-protected harbor. It was settled in the early 17th century when Roger William purchased land from the Narragansett Indians and established a trading post. Wickford grew to become a major port and shipbuilding center.

This elf is ready to go
Today, Wickford is a picturesque village whose waterfront streets are lined with shops, restaurants and colonial-era homes. Each year the North Kingstown Chamber of Commerce organizes a Festival of Lights with holiday themed actives. Since 2010, RICKA has participated in this event by escorting Santa down the harbor for his big arrival at the Town Dock.

We arrived at the put-in at the end of Main Street next to Gardners Wharf Seafood at around 11:30 to decorate our boats and get our elf hats and candy canes from Pat. At around 12:10, Michelle walked down to the dock and the rest of us headed over to meet up with Santa for the paddle into town. I am always amazed at the crowd that gathers for this event. 


And I got another poem from Tom - this time on Facebook.

What is appeal
neath cone of teal
with a Blitzen towards the bow?
Well is not it pleasant
that behind the present
canoe there's an elfish pal?
TW

Links: